Sesam GeniE to PDMS Data Exchange is ready from today, 15th December 2021.
You can start by clicking here to start a new Data Exchange job and finalise it in few Steps.
Step 1: It will redirect you to login page which you can either login into our portal or create a new account.
Step2: After login or signup you will be redirected to https://taha.no/tdx_job page which you can then select Sesam GeniE as a Source as shown below:
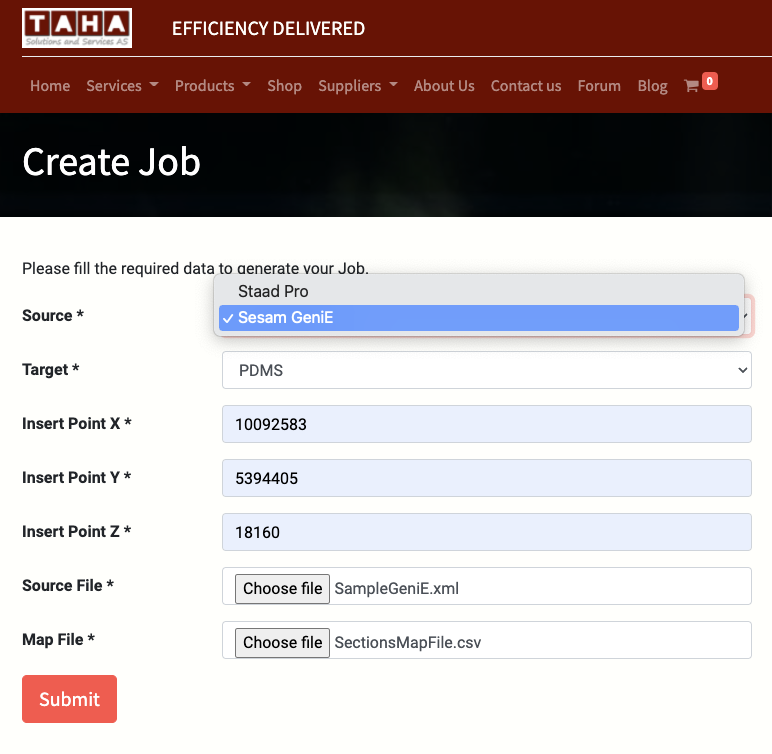
Step 3: Make sure PDMs is selected as Target.
Step 4: Provide Insert Point X, Y and Z if you would like the model in PDMS to be shifted to a specific coordinate.
Step 5: Select the Sesam GeniE file which is supposed to be a XML File
Step 6: Select the Map File to map the Sesam GeniE Sections to PDMS Sprefs which you can read about how to create such map file here.
Step 7: Click on Submit Button and assuming that you are not missing any sections in your Mapping File the platform will redirect you to the Product Page and will inform you about the number of elements in your Sesam GeniE file (MOQ is 100 Elements) as shown below:
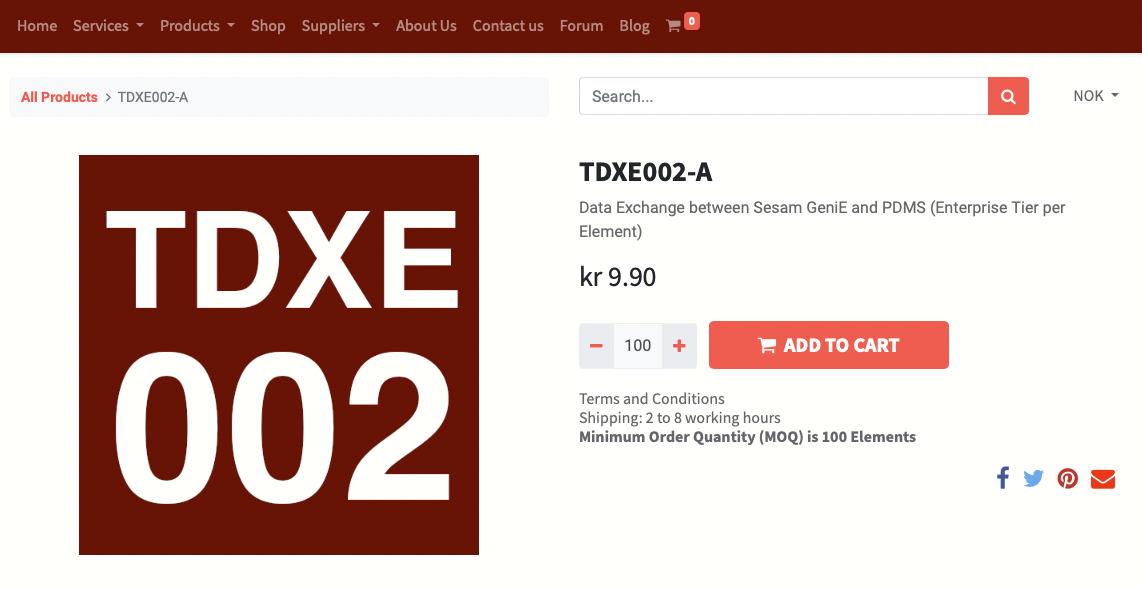
Step 8: Click on the ADD TO CART Button which will redirect you to the Review Order Page as shown below:
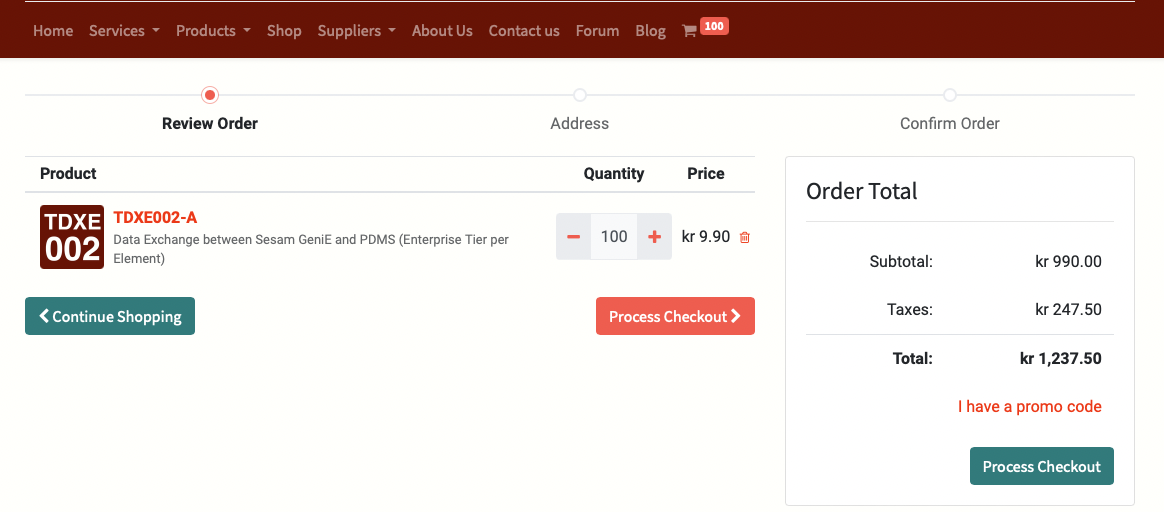
Step 9: Click on Process Checkout Button which will redirect you to the Address Page if this is your first order as shown below:
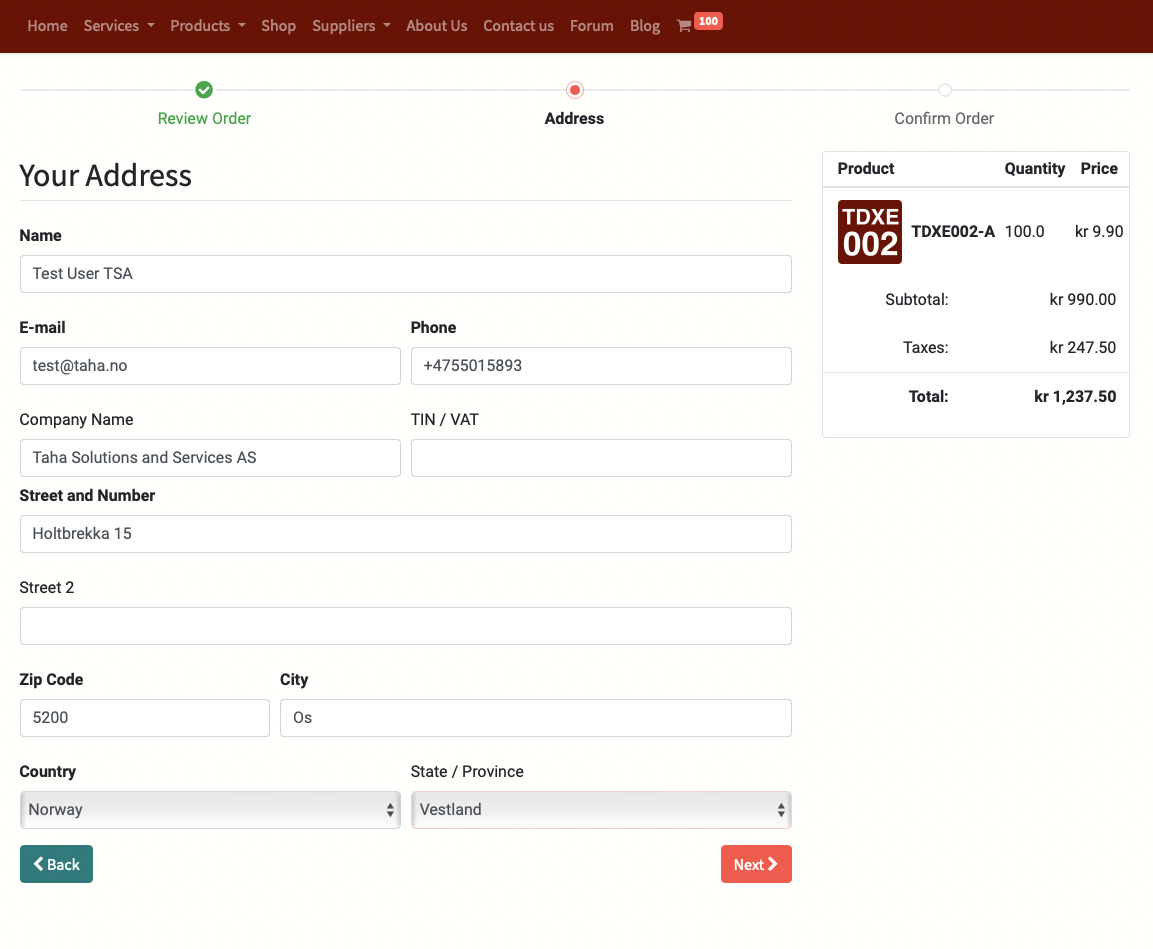
Step 10: Fill the form and the click on Next Button which will redirect you to the Payment Page as shown below:
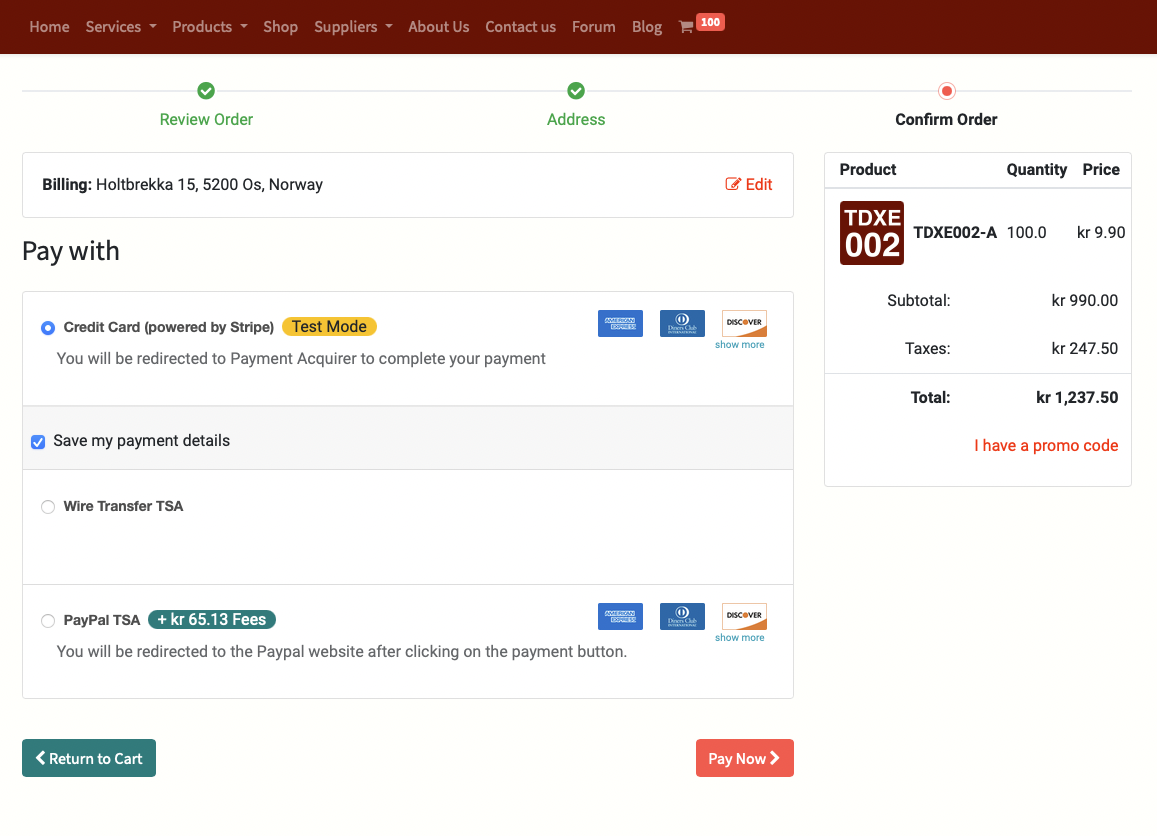
Here you can select your payment method with three options of Credit Card (Powered by Stripe), Paypal or Wire Transfer.
Please Note that the Output file generation will be hold for successful payment which means if you chose Wire Transfer you need to send us the payment receipt and we will finalise your Data Exchange Job after receipt of your payment.
You can also chose to save your payment detail for faster checkout for your future orders.
You will be redirected to the Stripe or Paypal site if you chose online payments i.e. Stripe Payment Page as shown below:
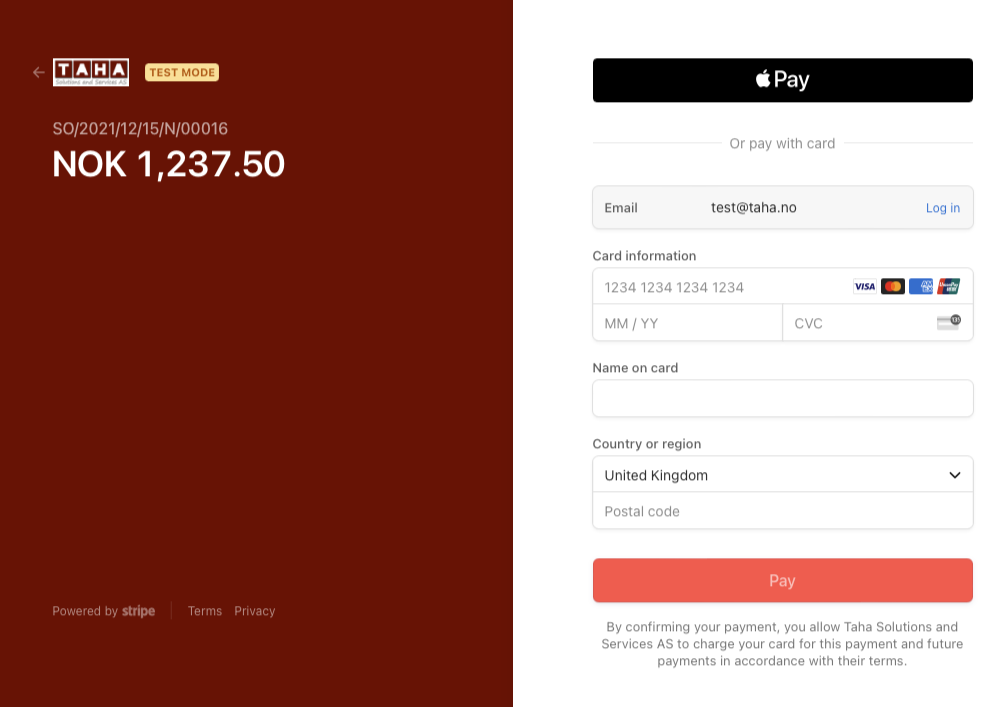
Step 11: fill your Card Details or finalise your Paypal Payment and upon successful payment you will be redirected to the Order Confirmation page as shown beloa:

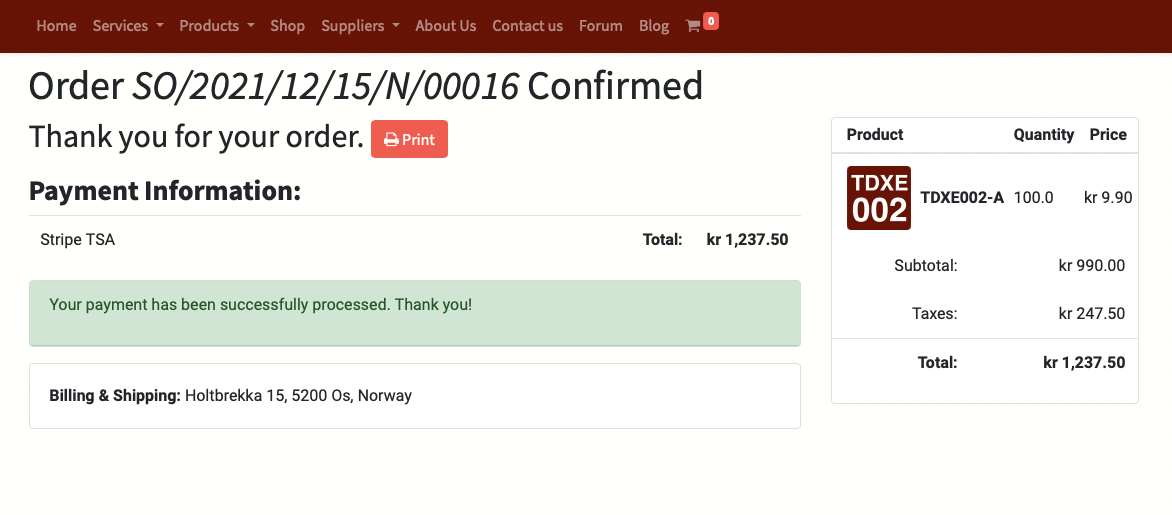
Step 12: If your payment is Successful the you can go to My Account page which can be chosen by right click on your User Name on Top Right Corner as shown below:
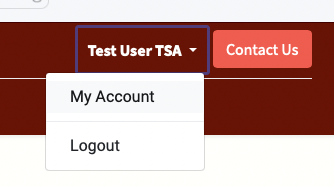
It will then redirect you to your My Account page. Alternatively you can click here to see this page.
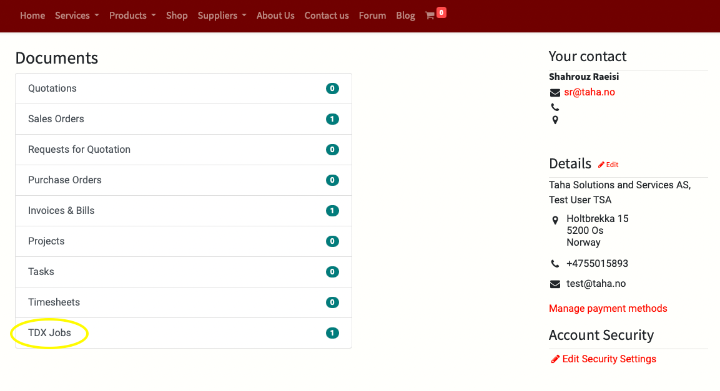
Step 13: Click on TDX Jobs link to go to your TDX Jobs Page and you can download your output file by clicking on output.mac link as shown below:

You can then drag & drop this file into your PDMS Command Line Window which will conclude your Sesam GeniE to PDMS data transfer.
If you have any issues in the process or in your data Transfer please create a support ticket in our support portal otherwise Happy Detailing in PDMS.
Please note you can also see the Sales Order and Invoices on your last successful Data Exchanges in your My Account Page.